
Campervan solar panels are a fantastic way to power your motorhome while on the road. They offer a sustainable and efficient energy solution, allowing you to stay off-grid without worrying about draining your batteries. This guide will walk you through the essentials of campervan solar panel fitting, from understanding the components to the installation process.
Why install Solar Panels on your Campervan?
Solar panels bring numerous benefits to campervan and motorhome owners, such as:
- Sustainability: Harnessing the sun’s energy reduces reliance on non-renewable resources, making your adventures more eco-friendly
- Cost Savings: Solar power minimises the need for campsite hookups or generator fuel
- Off-Grid Freedom: Enjoy the flexibility to travel to remote locations without compromising your power needs
Understanding Campervan Solar Panel Systems
There are various components that make up a solar panel system:
Solar Panels: Convert sunlight into electricity. Options include:
- Monocrystalline: Made from a single piece of silicon, more efficient and space-saving, ideal for campervans
- Polycrystalline: Also known as multi-crystalline, made from different silicon fragments, less efficient but more affordable
Charge Controller: Regulates the electricity flow from the panels to the battery:
- PWM (Pulse Width Modulation): Basic and budget-friendly
- MPPT (Maximum Power Point Tracking): More efficient and suited for larger systems
Battery Bank: Stores energy for later use:
- Lead-Acid Batteries: Affordable but heavier and require maintenance
- Lithium-Ion Batteries: Lightweight, longer-lasting, but more expensive
Inverter (if needed): Converts DC power from the batteries to AC power for appliances
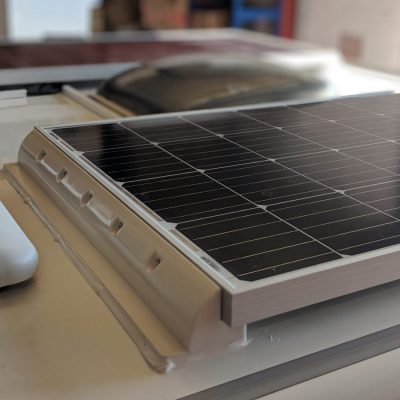
Choosing the right Solar Panels
When choosing solar panels for your campervan there are various factors to consider. First you should look at the size and weight of the solar panels, and ensure they can comfortably fit on your vehicle’s roof. When choosing the right solar panel size, you should also consider your daily energy requirements, and choose a system that can generate and store enough energy to meet your needs.
Additionally, you should consider the efficiency of the solar panels. High-efficiency panels may cost more, but generate more power in limited space. It’s important to balance cost and performance based on your energy needs and travel style.
For great campervan solar panel kit options, check out our sister company Sunstore Solar.
Campervan Solar Panel Installation Process
- Plan and Mark the Installation: The best roof placement for your solar panels is where they’ll get maximum sun exposure throughout the day. Avoid shading by keeping the panels clear of vents, skylights or roof racks that might cast shadows. Lay out your solar panels on the roof to determine their placement, and then mark the positions for the mounting brackets and cable entry points.
- Mount the Solar Panels: Next, attach brackets to the panels and secure them to the roof with screws or adhesive. It’s important to ensure they’re properly angled if using adjustable mounts.
- Wire the Panels: Connect the solar panel cables to the charge controller, and route the cables through the roof using waterproof cable glands. You can secure the cables with zip ties to prevent movement if needed.
- Connect the Charge Controller: Mount the charge controller inside your campervan and wire it to the battery bank, following the manufacturer’s instructions.
- Test the System: Use a meter to check the panel output and ensure the battery is charging correctly. Confirm all connections are secure and functioning.
- Seal: Apply sealant to all cable glands and mounting points to prevent any water damage. Tidy the wires and secure loose ends for a neat finish.

Common Solar Panel Installation Challenges
There are a few potential challenges you may encounter when fitting solar panels on your campervan. Here’s a quick summary and how to overcome them:
- Shading Issues: Place panels strategically to avoid shadows from roof fixtures
- Insufficient Power: Add panels or upgrade your battery bank if your system doesn’t meet your energy needs
- Faulty Connections: Double check wiring and use a meter to identify and fix issues
Campervan Solar Panel Maintenance
Regular maintenance ensures your campervan solar panels stay in the best condition. When cleaning the panels, remove dirt and debris using a soft cloth and soapy water. You should periodically check the system’s wiring, seals and alignment for any signs of wear or damage.
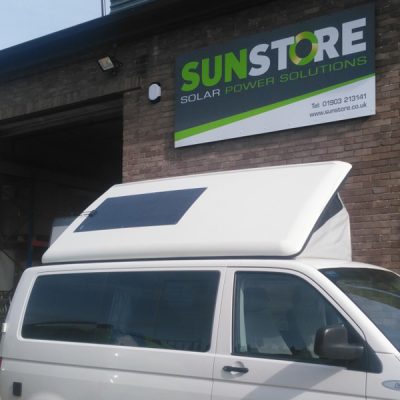
Why choose Motorhome Workshop for Solar Panel Installation?
At Motorhome Workshop, our team has extensive experience in campervan solar panel fitting. We offer installation services for all motorhome models, and have suitable solar panels for all energy requirements. We ensure your system is installed to the highest standards for long-lasting performance and reliability.
FAQs
Costs vary depending on the system size and components. As a guide, you can expect to pay between £300 and £1500 for the solar panels and installation combined. Click here to see Motorhome Workshop’s up to date pricing.
Yes but it requires careful planning, the right tools, and electrical knowledge. Professional solar panel installation like we offer at Motorhome Workshop is recommended for the best result.
The number of solar panels you need for your campervan depends on your energy needs and roof space. Calculate your approximate daily energy consumption to determine the required capacity.
Installing campervan solar panels is a great way to embrace sustainable energy, save money, and enjoy off-grid adventures. With careful planning and the right system, you’ll have a reliable power source for all your travels.
If you’re looking to install campervan solar panels, contact Motorhome Workshop for a professional and reliable solar panel fitting service.